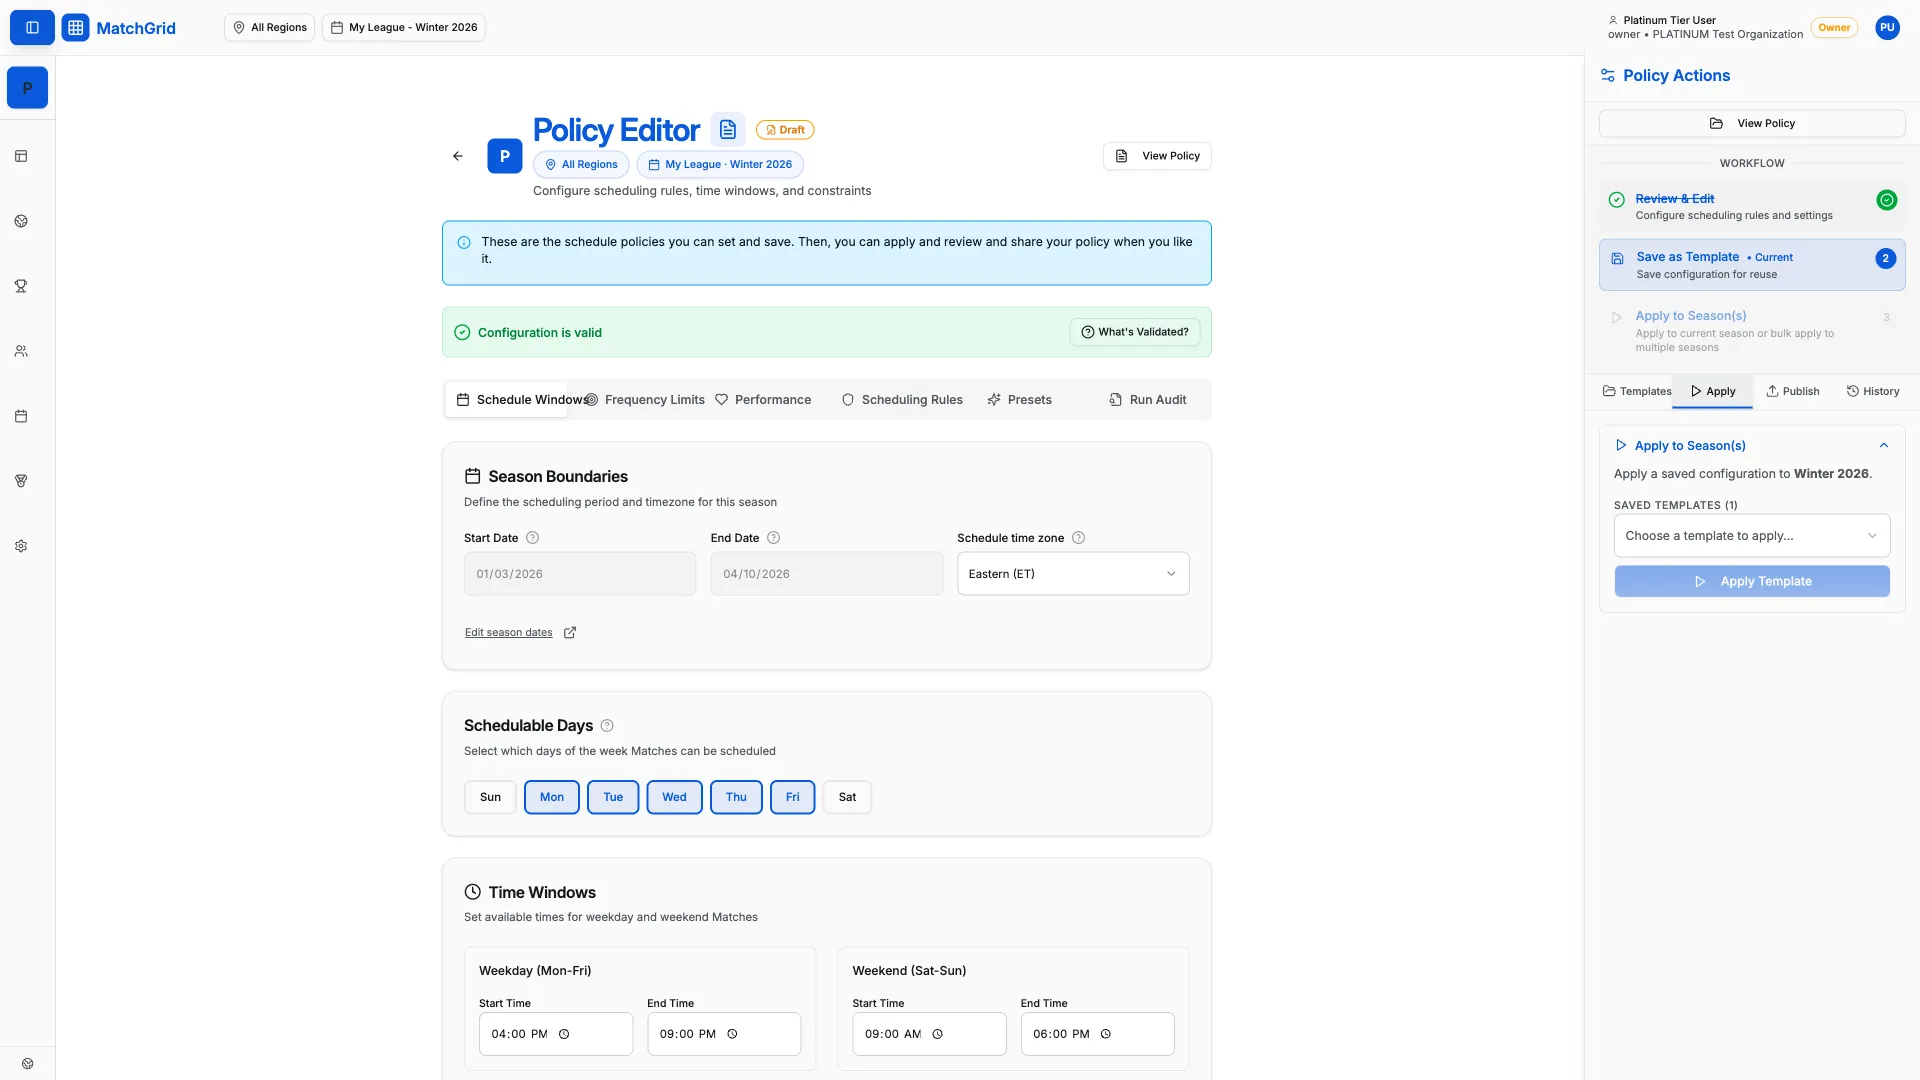
Saving Scheduler Policies
After configuring your scheduler settings, save them as a named policy. This creates a version you can publish and apply to your seasons.
Steps to save a configuration
- Click Settings in the sidebar
- Click Scheduler in the settings menu
- Select your Season from the dropdown at the top
- Make your configuration changes in the tabs
- Scroll down to the bottom of the page
- Click the Save Configuration button
Naming your configuration
When you click Save Configuration, a dialog opens:
- Enter a Configuration Name (e.g., “Spring 2026 Competitive”)
- Click Save New to create a new version
[!INFO] Each save creates a new version. You can view previous versions in the Version History and revert if needed.
Viewing version history
To see all saved versions:
- Click More actions (three dots menu) in the header
- Click Version History
- Browse previous configurations
- Click a version to restore it
Saving as a template
To reuse a configuration across multiple seasons:
- After saving, click More actions
- Click Save as Template
- Name your template
- Apply the template to other seasons from the Presets tab
[!TIP] Templates are useful when you manage multiple seasons or regions with similar rules.
What’s next
After saving your configuration, publish it to make it active — see Publishing a Scheduler Policy.